How Photoshop Actions Have Changed the Way I Use Photoshop
Photoshop is an incredible tool that comes with hundreds of functions.
We adapt Photoshop to our needs and we normally end up using just a few of them.
But, how many times a day we use each tool? How many times a day we repeat the same sequence of commands?
Wouldn’t be great to improve and automate the way we use our tools?
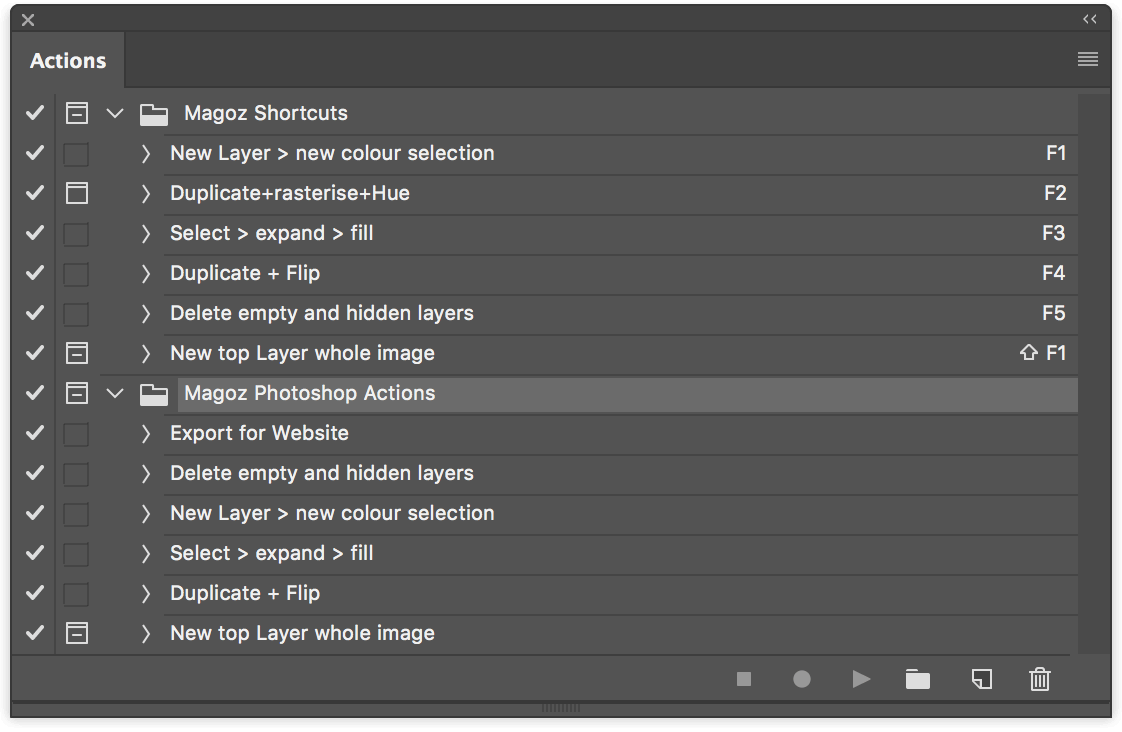
Photoshop has a built-in powerful automation feature called Actions.
Photoshop actions allow us to record a sequence of actions and then run that sequence whenever we want with just one click from the Actions panel. And even better, we can assign a keyboard shortcut, making the process even faster.
Why are Photoshop actions useful
- Merging several steps in one saves you time.
- You can create complex workflows concatenating actions.
- You don’t need to remember the details and steps to achieve a particular result. Record an action and the process will always be available within a click.
- You can bulk edit images using the powerful File > Automate > Batch.
Some of the Photoshop actions I use
I want to share with you some of the actions I use every day. You can download and adapt them to your own needs.
To import them first activate the Actions Panel (Window > Actions) and then import my actions using the options of the Actions > Load.
I use Photoshop CC, but the actions might work as well in older versions.
1. Export all the required image versions for my website
My website needs 4 different sizes of every image I upload. I coded it in that way to work well with Retina Displays and also to help to load the website fast.
This action exports to the desktop the four images sizes I need.
The sizes and formats are very specific to my website, but you can adapt it to your needs.
The sequence:
1- Flatten image.
2- Convert to RGB.
3- Change image size to 1220px wide.
4- Export a PNG to the desktop and name it magoz-@2x.png.
5- Go back to the step nº2.
6- Change image size to 610px wide.
7- Export a PNG to the desktop and name it magoz.png.
8- Go back to the step nº2.
9- Change image size to 760px wide.
10- Export a PNG to the desktop and name it magoz-thumbnail-@2x.png.
11- Go back to the step nº2.
12- Change image size to 380px wide.
13- Export a PNG to the desktop and name it magoz-thumbnail.png.
14- Close the file without saving the changes.
2. Delete empty and hidden layers
I end up having lots of layers, and the most of them are hidden or empty. This action cleans the .psd file.
The sequence:
1- Delete hidden layers.
2- Delete empty layers.
3. Change the colour of the layer contents
As I work with a few colours and every layer contains only one shape and one colour, this action is extremely useful for me.
The sequence:
1- Select all the contents of the current layer.
2- Create a new layer.
3- Fill the selection on the new layer using the foreground colour.
4. Fill a selection avoiding the annoying pixel border
When I draw, I don’t manually fill all the shapes. I usually only draw the outlines of shapes. Then I select the inside using the magic wand and fill it. But, this approach has a problem, you must expand the selection before filling it to avoid a small area that is not filled.
The sequence:
1- Expand the selection.
2- Fill using the foreground colour.
5. Duplicate and flip a layer
I use the flipping function a lot, and this small action saves me a couple of clicks every time.
The sequence:
1- Duplicate the current layer.
2- Flip the new layer.
6. New layer with a copy of all the layers merged
This action is fundamental when I’m choosing or tweaking the colours of a new illustration. I usually copy the image and play with some adjustments as Hue Saturation to experiment with the colours. This action creates a new layer on top of the document with the full image and also opens the Hue/Saturation dialogue.
The sequence:
1- Select all layers.
2- Duplicate layers.
3- Merge all duplicated layers in one.
4- Open the Hue/Saturation dialogue.
More actions and ideas
I also use actions for other scenarios. Here are some ideas.
- When I need to export more than 5 images in a particular format (for contests, print or media, for example), it’s very fast to set up a new action and execute it using File > Automate > Batch.
You can define the source folder and the destination folder. It works like magic. - I have an action to export an image in 2000px PNG RGB. I always send the sketches with those specs.
- Every action I use has assigned a keyboard shortcut, which makes the whole process even faster.
I started using the Photoshop actions a few months ago, and it has completely changed the way I use Photoshop.
I’m always looking for ways of improving the way I interact with technology, and actions in conjunction with keyboard shortcuts optimise to the maximum the way I use Photoshop, making frequent and complex actions very fast.
Join +10k readers. No spam ever.
